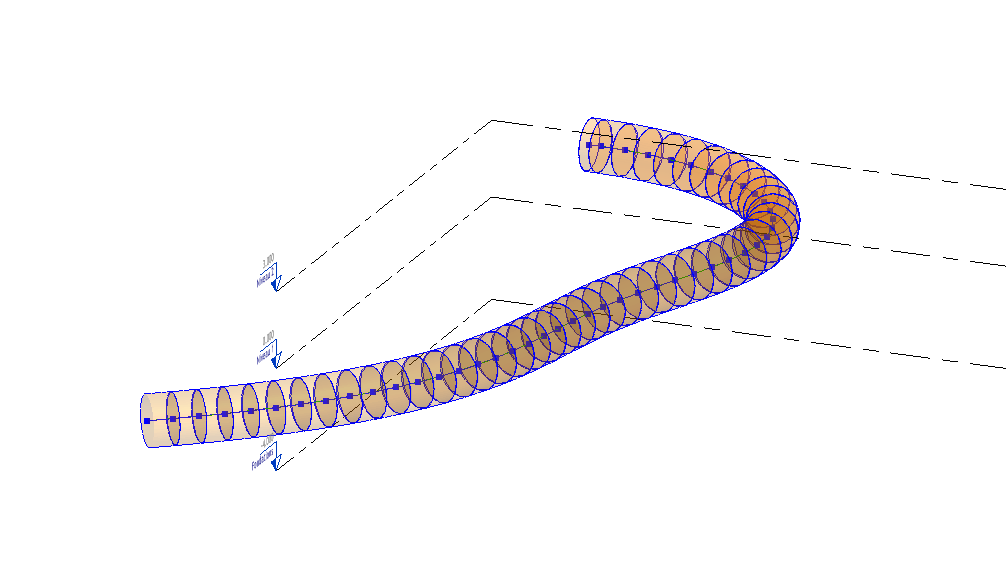
Hello there,
I’m currently working on a tunnel project. My goal is quite simple: I have my tunnel cross section, I have my 2D plan, and so I need to sweep the cross section along the curve of the tunnel.
I tried to do something with a parametric family. I was a simple tunnel ring (Ring2.rfa), and I was able to make some straight tunnels with it and also control the radius and length of each ring (and also some USC parameters, colours, etc.). But I was unable to make it work for curved tunnels (Tunnel LoD23.dyn).
So then I tried another method; instead of using a plain tunnel ring, I tried using a specific profile (profil_tunnel_1). Because it’s just 2D, it will not be a problem even for curves. So I tried to reuse some script found on the forum, allowing me to create a perfect circle around some coordinates (tube_long_points_simple.dyn). But then I want to do the same with my custom drawing.
The final goal is to have a BIM model of my tunnel and to be able to separate it into different elements (for example, each meter). Then, what would be the best solution? Sweep a 2D plane along the path or sweep a family (that also means create the family in Revit).
Files are here : Unique Download Link | WeTransfer
Thanks a lot for your help and time.
Best regards,
Quentin Chevrier
Here are the files pictures too if the link expires.
@quentin2.chevrier — as @sovitek mentioned, it’s recommended to use adaptive components with two or three points.
I’d also like to reference this Autodesk University class, which is relevant for @ATTEL9DCS. It presents a TBM tunnel modeling workflow:
 Parametric Modeling and Automating Placement of Universal TBM Rings (AU 2021)
Additionally, here is my class on how to model linear infrastructure in Revit:
Automated Linear Structural BIM (AU 2019)
Finally, this Dynamo package might be helpful:
brimohareb xxxx package for Revit xxxx — DynamoBIM Forum
Hi and thanks a lot for the fast answer.
I think the script you sent is perfect to make a tunnel with TBM rings of a chosen diameter.
If I am right, the top of the script is used to select a curve and create the path, and the bottom is used to sweep a circle around that path and then split it into several parts, which is perfect for TBM rings.
Now, instead of using the node Circle.ByCenterPointRadius, I can use the same with a rectangle or a square, for example… what about a chosen 2D drawing?
Can I just do the same with a 2D geometrical shape (and this shape will be my tunnel shape, of course)?
If yes, that can be a very easy solution considering I already have my 2D cross section and my curve.
If not, then I will need to make an adaptive family to make it work. I will look into it since I have never done that before.
Thanks again for the help.
Quentin
Hi there,
I will have a look at what you send! I think using a script only with a generated 2D plane can be easier at the beginning, but using an adaptive family is really the best long-term solution.
For example, if I create a library of all the tunnel shapes we use in our project, I can just create all of my tunnels in minutes (shape 1 for the first 1000 m, then shape 2, etc.).
Is there an easy way to create an adaptive family using a 2D CAD drawing?
Thanks a lot for your time.
Quentin
Yes no matter the profile, circle, rectangle etc…or could even be a sketch from a drafting view or curves from a profile family, as we just transform the profile into right position on the path 
Oh, that is fantastic! Is there a particular node to use to do it with a sketch from a draughting view or with a profile family?
That way I can just use my dwg (profil_tunnel_1) and sweep it along the path. That can also allow me to sweep different profiles along the same path with a little script modification.
yes in a drafting view just select the lines and get location…and should work…for family type profile curves you could try something here
import clr
clr.AddReference('ProtoGeometry')
from Autodesk.DesignScript.Geometry import *

# Import ToDSType(bool) extension method
clr.AddReference("RevitNodes")
import Revit
clr.ImportExtensions(Revit.Elements)

# Import DocumentManager and TransactionManager
clr.AddReference("RevitServices")
import RevitServices
from RevitServices.Persistence import DocumentManager
from RevitServices.Transactions import TransactionManager

from System.Collections.Generic import *

# Import RevitAPI
clr.AddReference("RevitAPI")
import Autodesk
from Autodesk.Revit.DB import *

doc = DocumentManager.Instance.CurrentDBDocument
uiapp = DocumentManager.Instance.CurrentUIApplication
app = uiapp.Application

type = UnwrapElement(IN[0].Family.Name)
name = UnwrapElement(IN[0].Name)

family = UnwrapElement(IN[0]).Family

TransactionManager.Instance.ForceCloseTransaction()
famDoc = doc.EditFamily(family)

famCollector = FilteredElementCollector(famDoc)
sketch = famCollector.OfClass(Sketch)

for i in sketch:
	cArray = list(i.Profile)
cArray[:] = [[Revit.GeometryConversion.RevitToProtoCurve.ToProtoType(y, True ) for y in x] for x in cArray]
OUT = cArray
Wonderful! I will try all of your solutions next week and let you know if I successfully did it! Using your script and then just a draughting view can be a very efficient workflow to create a 3D representation of a tunnel. Then I can divide it into different elements and add properties to them.
Using adaptive families is maybe more long-term efficient since I can create a library of all my families with all the needed properties along my curve. To do that, I will check the resources @RMohareb sent me and see if I can figure it out on my own.
Thanks again !
Hi there,
So I spend some time trying to first fully understand your script and then trying it on a simple curve. And well, it is not working very well. I changed some parameters since my curve is way shorter (50 m), so I divided all the length parameters. But I still do not understand some parts and why I am having such strange shapes.
At the same time I will start working on some adaptive families, but I think using your script with 2D cross sections can be the first interesting step to create my tunnels.
You will find attached my files if you have time to have a look and understand why this is not working. Since I am a beginner, it may be some obvious part I don’t understand, and I am sorry in advance for that.
Best regards,
test1.rvt (9.1 MB)
circle_along_curve.dyn (60.0 KB)
i am not in 26 yet…could you share yhe path in 25 ?
Hi there, I don’t have 2025 anymore, but I figured out a solution using an easier script. I also started using adaptive family since it is more efficient.
But to answer the question, I can send you a screenshot of your script and the adapted script also.
circle_along_curve.dyn (60.0 KB)
tube_long_points_simple_curve.dyn (85.1 KB)