Hey @Dynamo_Ann , could you also mark which line in watch 3D node corresponds to which index in the first list? And if the location of cabinetry line is different from what’s shown in Test Room image then could be helpful to mark that as well.
I tried to recreate your problem and it worked for me.
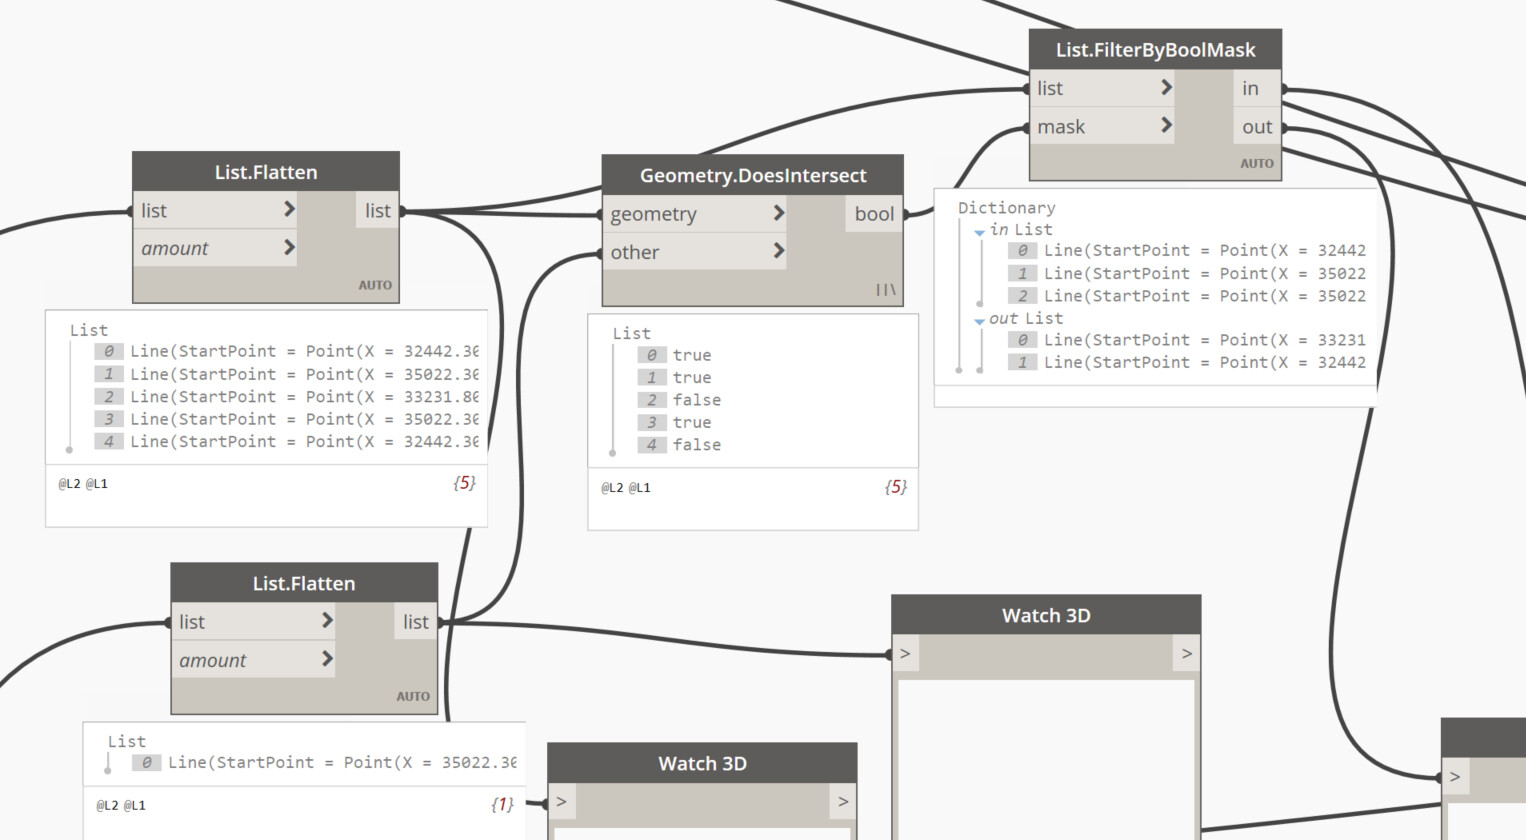
Your original list of curves only has 5 lines, which means the cabinet isn’t splitting those lines yet (the right side wall is one line). I think you have the wrong line selected. It looks like the right side wall is the line you’re using, which would intersect with the two lines it connects to and itself, as it seems to be doing.
Thank you for the replies, I really appreciate it.
@YashRathore You were right. I was not finding the correct intersecting curve at cabinetry to boundary curve. I have now located this. I have also tried to incorporate some nodes from your script provided.
The one thing I can find in your script that might not be working is that TrimInteriorByParameter needs to work just on one line that is intersecting with cabinetry. In your case you are using the node for all the lines.
Try filtering out just the right side wall with DoesIntersect node and then apply Trim on just that line.
As @YashRathore mentioned, you’re trimming your full list of lines. You’re also combining that original list with the trimmed lines at the end which means you’re not going to see the gap, as the original untrimmed line is still visible. You’ll have to turn off geometry preview for all the nodes you don’t want to see.
Geometry.DoesIntersect will return true even if the intersection is a point - which happens in the angles.
And it needs to be set to cross product to determine if any of the items in List1 intersects any of the items in List2.
You might want to try to intersect them and check if the intersections is a line. If it is a line than the two are on top of each other.
Hey @Dynamo_Ann,
Could you show the location of the solid geometry and output lines wrt to the initial list of lines?
Or it would be even better if you could share the dummy project file along with the dynamo graph.
Explode each line so that you won’t have any corners/ angles in your “Curves”.
Use their direction to group each line with the same direction into groups.
Group each line (inside these groups from #2) by their distance, now only touching lines of the same direction are grouped together.
Now extract each start and endpoint from all your Curves, then using these Points create every possible combination, i.e. 0-0, 0-1, 0-2, 0-3, 1-1, 1,2, etc.
Use these combinations and measure each distance between these points, 1 distance should be the longest.
From the longest distances of each group can we create a new line by their start and endpoints, now we end up (in this case) with 5 Curves, non-overlapping.
At last we can finally join these individual lines together into a PolyCurve.
The only downside I can think of is that Arcs/ Elipses/ Circles etc. will not keep their original shape since all lines are only manipulated by their start- and endpoints.
Of course! Apologies for the delay, here’s the .dyn file. Struggling to load sample file.(image is from the Revit Residential sample file with casework components loaded in) should be pretty straight forward in most projects.
Notes:
Custom node is from a LinkedIn tutorial (Revit and Dynamo for Interior Design - William Carney), works off co-ordinates to get the curves all in the same direction. so if it doesn’t work, adjust the co-ordinates to top left of the project.
Script works well as is, but I’d like to refine it to remove cabinetry (so I don’t have to split walls at those locations etc).
Try use Geometry.SplitByTools from Ampersand to split curves with cabinets. After look into Geometry.PruneDuplicates from Data-Shapes. I’ll help later today.cabinets.dyn (45.3 KB) Geometry_DeleteDuplicates.dyf (8.0 KB)
Thank you so much , I can find the intersection lines at casework, but I just cant figure out how to remove it from the main curves line, ie. list 1 - list 2…? did I miss a step?