Hi guys,
I’m trying to create a exploded view but I haven’t found anything on the subject…
In the API there is a method to create a DisplacementElement, but it needs a parent DisplacementElement.
https://www.revitapidocs.com/2019/891b2088-81e0-aa88-5e8b-3ffacc3d35a3.htm
In another words, I need to create it first in revit and then apply the “translation” in dynamo/python?
Is there any way to do it fully in python?

It’s all in the documentation:
public static DisplacementElement Create(
	Document document,
	ICollection<ElementId> elementsToDisplace,
	XYZ displacement,
	View ownerDBView,
	DisplacementElement parentDisplacementElement
)
Document Is the current document: doc = DocumentManager.Instance.CurrentDBDocument
ICollection<ElementId> is the .Net list of Ids - see here - of elements you want to displace
XYZ is a vector - see here
View is the parent view for your displacement
DisplacementElement is:
An existing DisplacementElement that will be the parent of the one being created.
If you check documentation there is a sample:
public static void CreateDisplacementAndPath(Document doc, View view)
{
    // Find roof
    FilteredElementCollector fec = new FilteredElementCollector(doc);
    fec.OfClass(typeof(RoofBase));
    RoofBase roof = fec.FirstElement() as RoofBase;

    // Get a geometric reference for the path
    Reference edgeRef = GetHorizontalEdgeReference(roof);

    using (Transaction t = new Transaction(doc, "CreateDisplacementAndPath"))
    {
        t.Start();
        // Create a new top level DisplacementElement
        DisplacementElement dispElem = DisplacementElement.Create(doc, new ElementId[] { roof.Id }, new XYZ(10, 0, 20), view, null);

        // Create the path associated to the element
        DisplacementPath.Create(doc, dispElem, edgeRef, 0.5);
        t.Commit();
    }
}
You can see that DisplacementElement is the sample null (None in Python). It means that this is a parent displacement.
It’s all doable in Python. Just create a Python node, start writing some code and remember to wrap it in Transaction.
2 Likes
Firstly, thanks for the reply. This community is awesome.
Secondly, I’ve tried to understand about iCollections and XYZ classes…
After some errors, now I got stuck in this one.
Warning: IronPythonEvaluator.EvaluateIronPythonScript operation failed.
Traceback (most recent call last):
File “”, line 38, in
Exception: #elementIds# contains no element ids.
Parameter name: elementsToDisplace

import clr

clr.AddReference('RevitAPI')
from Autodesk.Revit.DB import *
from Autodesk.Revit.DB.Structure import *

clr.AddReference('RevitAPIUI')
from Autodesk.Revit.UI import *

clr.AddReference('System')
from System.Collections.Generic import *

clr.AddReference('RevitNodes')
import Revit
clr.ImportExtensions(Revit.GeometryConversion)
clr.ImportExtensions(Revit.Elements)

clr.AddReference('RevitServices')
import RevitServices
from RevitServices.Persistence import DocumentManager
from RevitServices.Transactions import TransactionManager

doc = DocumentManager.Instance.CurrentDBDocument
uidoc=DocumentManager.Instance.CurrentUIApplication.ActiveUIDocument

#Preparing input from dynamo to revit
elementIDS = UnwrapElement(IN[0])
vetor = UnwrapElement(IN[1])
vista = UnwrapElement(IN[2])


#Do some action in a Transaction

TransactionManager.Instance.EnsureInTransaction(doc)

icollection = List[ElementId](elementIDS)

dispElem = DisplacementElement.Create(doc, icollection, XYZ(vetor.X,vetor.Y,vetor.Z), vista, None);


TransactionManager.Instance.TransactionTaskDone()

OUT = dispElemUPDATE
I’m very happy to say that I managed to make it work. I created a custom node for dealing with multiple lists and different vectors.
It’s my first successful python script. Even if it’s little, it motivates me to learn more and more. Thanks again to the dynamo community.


import clr

clr.AddReference('RevitAPI')
from Autodesk.Revit.DB import *
from Autodesk.Revit.DB.Structure import *

clr.AddReference('RevitAPIUI')
from Autodesk.Revit.UI import *

clr.AddReference('System')
from System.Collections import *
from System.Collections.Generic import *

clr.AddReference('RevitNodes')
import Revit
clr.ImportExtensions(Revit.GeometryConversion)
clr.ImportExtensions(Revit.Elements)

clr.AddReference('RevitServices')
import RevitServices
from RevitServices.Persistence import DocumentManager
from RevitServices.Transactions import TransactionManager

doc = DocumentManager.Instance.CurrentDBDocument
uidoc=DocumentManager.Instance.CurrentUIApplication.ActiveUIDocument


elementos = UnwrapElement(IN[0])
vetor = UnwrapElement(IN[1])
vista = UnwrapElement(IN[2])

listaids = []

for i in elementos:
	listaids.append(i.Id)

TransactionManager.Instance.EnsureInTransaction(doc)

icollection = List[ElementId](listaids)

dispElem = DisplacementElement.Create(doc, icollection, XYZ(vetor.X/30.48,vetor.Y/30.48,vetor.Z/30.48), vista, None);

TransactionManager.Instance.TransactionTaskDone()

OUT = dispElem
4 Likes
Hi Ricardo,
Thanks for this, I’m trying to get a script that will explode parts of an assembly view but I can’t get your python script to run for “vetor = UnwrapElement(IN[1])” I get an Index error any idea why that would be happening?
Thanks
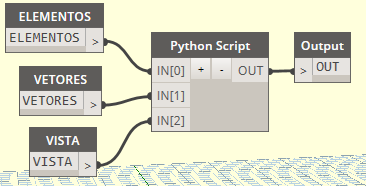
@HuwESC2V you’ll need 3x input ports on your Python node ![]() Simply click the
Simply click the + button twice. You should have on the node:
- IN[0]
- IN[1]
- IN[2]
1 Like
Of Course!
Super simple, been a long day on Dynamo thanks!!
1 Like
hello @ricardo.zimmermann

i was trying to recreate this process but running into an error…
do you have some advice? I am not that much into python.
Thanks in advance
greetings Kev