Element binding is the name given to the process which Dynamo manage to ‘track’ the items created in non-Dynamo files. In this case, I’m going to focus entirely on element binding as it refers to Dynamo for Revit, but the mechanism exists to allow for this behavior in other applications (advanced steel, fusion, alias, etc.) as well. In the context of Revit, ‘elements’ refers to anything with an Element ID in the Revit database. When utilized correctly, element binding will expand how you leverage Dynamo, and enable a lot of new functionalities. Conversely, when misused it will slow down your Dynamo performance and slow the speed at which graphs perform. Let’s look at an example.
Download the following:
Project: Element Binding Review.rvt (1.3 MB)
No Element Binding: No Element Binding.dyn (11.2 KB)
Open the file in Revit 2019, and then launch Dynamo 2.0 (sorry if you’re not up to date - install the new stuff or just read along). Once in Dynamo, open the .dyn attached, and save it as “Element Binding” right away. It’s a pretty simple graph, makes a rectangle, gets the curves, and then creates walls from those - hopefully things make sense. Go ahead and run the graph, creating the walls in the project. Verify the 4 walls were created and if not, I guess post back here so we can figure out why. Then change the size of the rectangle - notice that the dyn still runs fairly smoothly and moves the previously created walls to a new location. Now save the .dyn and close it.
Now go find the two files in your file browser. Notice the difference in the file size. Mine went from 12mb to 19mb. This jump was more than 50% of the size of the previous file. The extra 7mb represents the element binding. Opening the files in Dynamo for Revit’s default UI (meaning no view extensions - I’m looking at you @john_pierson), there are no discernible differences between the two.
The content is instead stored inside the json formatted .dyn, so we need to look at the files contents in a means other than the default UI, such as a web browser or text editor. This is what the “No Element Binding” file looks like in Notepad++:

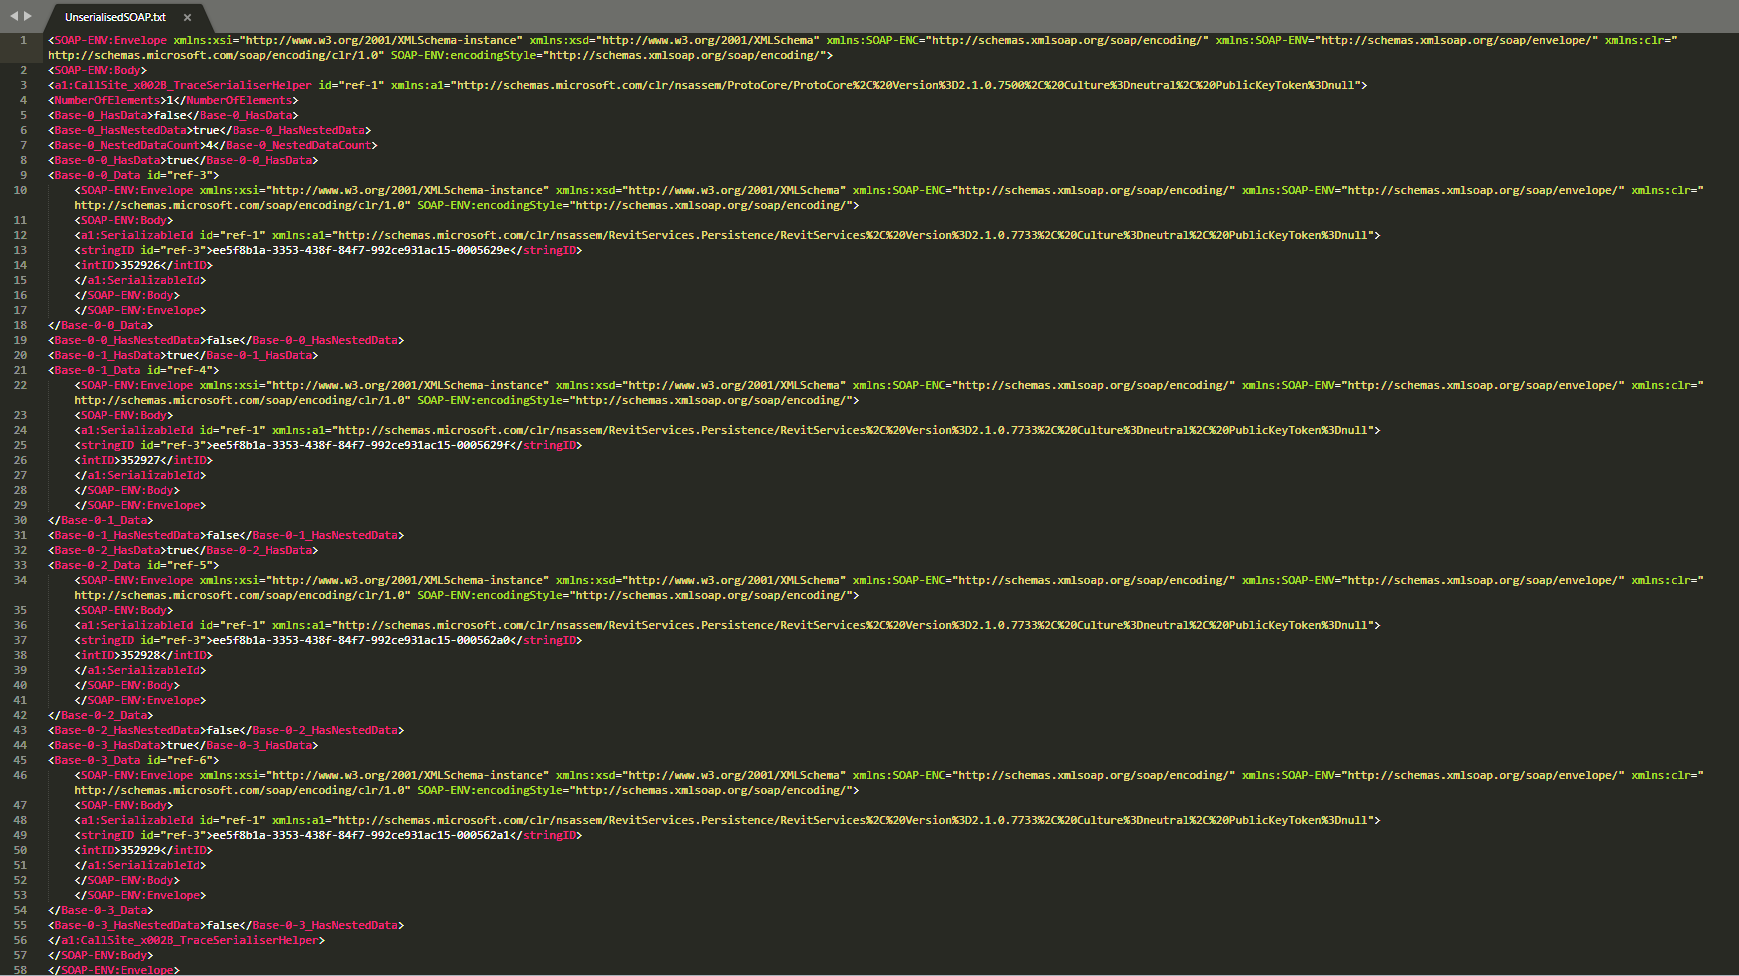
reading up on JSON files is a good idea for anyone in computational design, but the bsics is that the files are organized by "Key" : [values].You can see this in the dyn file showing Key : [values] for the various parts and pieces. You can learn a lot about what happens under the hood in here. The key associated with element bindings is: Bindings, so search the text for that key and you’ll see the contents contained therein, and in the no-bindings file you should see nothing in the brackets. Conversely, in the Element Binding file (the save as version), you should see something like this:

That large non-readable value is a serialized data set, which means that I can’t read it. Well, if you can I welcome my new robot overlords.
So now that we’ve found the data, how is it being used by Dynamo? From a semi-technical standpoint, Dynamo is de-serializing the bindings, reading the data, pulling the node which contains the bindings, reading the Revit model to find the elements, and then attaching the elements to the node - just as if you’d run the graph and produced the elements in the same run. This allows the elements to be updated instead of created from scratch.
So now that we know how bindings work, let’s look at them in action. Be sure to close out the .dyn files in your text editior/web browser/whatever before we get going. Add a few windows to each wall, build a floor and roof associating them to the walls and locking sketches as needed, and adding comments to the walls. Now going back into Dynamo, open the ‘Element Binding’ file and hit run. First off you’ll notice the file is slower to execute. This is related to processing the bindings - everyone would like it to be faster. There is a GitHub issue for this which you can follow along on the repo if you’re into that.
The next thing you’ll notice is that once the file runs, the walls and the associated elements update their geometry/locations instead of creating new walls in place of the old ones. yes, this means you can do some really nice stuff without breaking down or delaying the design process. You can even swap the initial rectangle for the other polygons - interesting results can be found for hexigons, triangles, and the like. Note that in some cases this will cause linked items to fail (for what should likely become obvious reasons to a seasoned Revit user).
Ok, time for some caveats.
- Element binding is only applicable to a single document. If you use a .dyn to make some walls on file 1, it won’t update contents in file 2. This is something worth considering and keeping in mind when you make new central models. This also means that if you have an ‘all star graph’ that you want to use on many projects, you should clean the bindings out and save the .dyn uniquely for each model.
- Element binding doesn’t necessarily work this way with other applications (Advanced Steel, Alias, Fusion, etc). If you’re a frequent user in those environments try replicating the above test and explore accordingly.
- Custom nodes and python based nodes will not necessarily work this way. If a custom node doesn’t perform and you wish it did, I recommend reaching out to the node’s owner to see if you can help them update it. For python nodes you’ll either need to revise how transactions and elements are handled in your code, or wrap it in a custom node.
- Since element binding is saved into the .dyn, you have to be sure to save the Dynamo graph after running it. This means that Dynamo player will not currently work, as Dynamo player doesn’t save graphs after executing them at this time.
Ok, but what if you don’t want element bindings? There are two methods to fix this which use. I recommend doing a save as in both cases, and checking the before and after carefully when done.
- Open a new Revit file, then open the .dyn in Dynamo, disconnect all nodes which ‘start’ the graph (basically disable anything in the ‘gather’ stage of your workflow), and run the graph. Quickly confirm that the many errors have produced a null result on EVERY node which interacts with Revit. Normally, this would be bad, but in this case… save the graph, reconnect the selection nodes, and save the graph again. The bindings should have been removed. Alternatively you can replace the nodes which create Revit content with new versions - copy/paste is your friend. This can be difficult as you may not know every node in your first pass. Both of these methods are more ‘user friendly’ to perform, as they keep you in the Dynamo user interface.
- Open the graph in a text editor, find the “Bindings” section, and remove all the content in the brackets. Be sure to catch it all and not mess with anything else - you may corrupt your .dyn otherwise. This is nice as it can be automated (with Dynamo even), and as such can be performed quickly on many files at once.
More info on this topic can be found in my AU class handout and recording here: https://www.autodesk.com/autodesk-university/class/Getting-Good-Stuff-Out-Pandoras-Box-Element-Binding-Dynamo-Revit-2019